

Installing Smaller Container Grown Plants
into the Northeast Florida Landscape
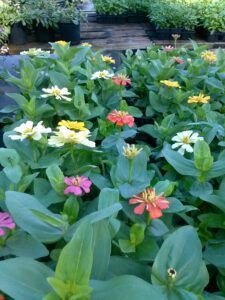
For smaller Nursery plants like
seedlings, 4 inch flowers or one gallon grasses, flowers or small shrubs the recommended planting process here in Northeast Florida differs a bit from the way we install larger growing trees and shrubs. The difference in the planting process is due to the fact that the roots of the plants will not grow large enough to grow beyond the area of amended soil we plant in. Unlike large trees that can have roots reaching far out into neighboring yards, smaller growing plants will have a very confined root system. This smaller area of root growth allows us to amend the soil heavily, even in some cases covering the native soil completely with potting soil, compost, leaf mold, peat moss etc.
Installing larger plants into the landscape? Click on this link for
help with installing larger shrubs and trees into the Northeast Florida
landscape.
Simple Steps to Installing Smaller Plants
into the Northeast Florida Landscape
1 – Dig the hole much wider and just a bit deeper than the size of the pot you purchased. We recommend making the planting hole at least three times as wide as the container grown plant you purchased.
2 – Add your chosen soil amendments and mix into the native soil. With smaller plants, you may choose to use just a little bit of soil amendment if you have good black healthy well draining soil, amend the soil to the point where it no longer resembles the native soil, or completely replace it with new compost, potting soil, etc. depending on your plants needs.
*If planting multiple smaller container grown plants into an area, you may opt to pre-dig and amend the soil in the entire planting area first. Loosen the existing soil by digging it up with a shovel and placing it back into dug area, add chosen soil amendment and mix together so that the entire planting area can be amended at one time.
3 – Gently remove the plant from the container by placing your hand over the top of the pot with the stems and foliage in between and
above your fingers. Place the other hand on the bottom of the plastic pot. Tip the container sideways or completely upside down onto the hand touching the dirt, and use the other hand to pull on the root system free of the plastic container.
Use caution not to damage the stems on soft stemmed plants like vegetables and flowers, both the roots and the leaves of a plant can be handled, tugged, pulled on if necessary or even squished with little to no damage to the plants growth, but the soft stems are vulnerable. The smaller your container is the more careful you will have to be to not damage the soft stems on young plants. If you crush the stem with your fingers
when removing the plant from the soil, you will damage the plants water and nutrient transport system, so use a little caution when removing plants and flowers with non woody stems.
( Just think…. grab them by the hair, not the neck! )
4 – Loosen the roots growing at the edges and bottom of the container grown plant by pulling at the exposed roots until the roots have begun to separate from the soil ball. This step will help your new plant get growing into the surrounding soil quickly.
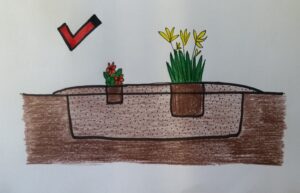
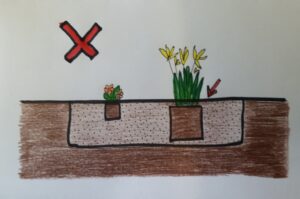
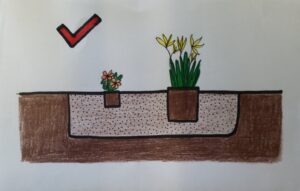
5 – Place your plant into the pre-dug hole, make sure that the roots system of the container grown plant will be level or slightly higher than the soil around it. It is crucial to your plants survival that no soil is placed on
top of the existing root system of the container grown plant that you purchased. The soil that was exposed to the air in the container should be exposed to the air when your planting is finished.

6 – Water the entire planting with a “rain wand” attachment that will soften the flow of water coming from your hose. Daily watering will be needed on all newly installed plants for a few weeks after planting your small container grown plants during the establishment period. Some plants will require supplemental irrigation once or twice a week
after that for the best results.
7- Mulch as needed, pay particular attention to not mulch near the stems of soft wooded flowers, vegetables or plants. Leave a circle a few inches away from the stems of the plant unmulched.